FlyteOperator Example
This tutorial will walk you through constructing an Airflow DAG using the FlyteOperator.
Note
The provider source code can be found in the airflow-provider-flyte repository.
Watch a demo of this provider below! It demonstrates an example of pulling NYC taxi data from S3, uploading it to CrateDB, and building an XGBoost model. The extract and load steps are handled by Airflow and the machine learning task is offloaded to Flyte using the Flyte Airflow Provider.
The Airflow DAG demonstrated in the video is available here.
Environment Setup
AIRFLOW
Astronomer’s CLI is the fastest and easiest way to set up Airflow.
Download the Astro CLI and then initialize a new astro project.
mkdir flyte-astro-project
cd flyte-astro-project
astro dev init
The directory structure of flyte-astro-project would look as follows:
.
├── Dockerfile
├── README.md
├── airflow_settings.yaml
├── dags
│   ├── example-dag-advanced.py
│   └── example-dag-basic.py
├── include
├── packages.txt
├── plugins
├── requirements.txt
└── tests
    └── dags
        └── test_dag_integrity.py
FLYTE
The Quickstart guide should help you with setting up Flyte.
Create an Airflow Connection
Hit http://localhost:8080/, give the credentials (default username and password: admin), navigate to Connections and create a
Flyte connection.
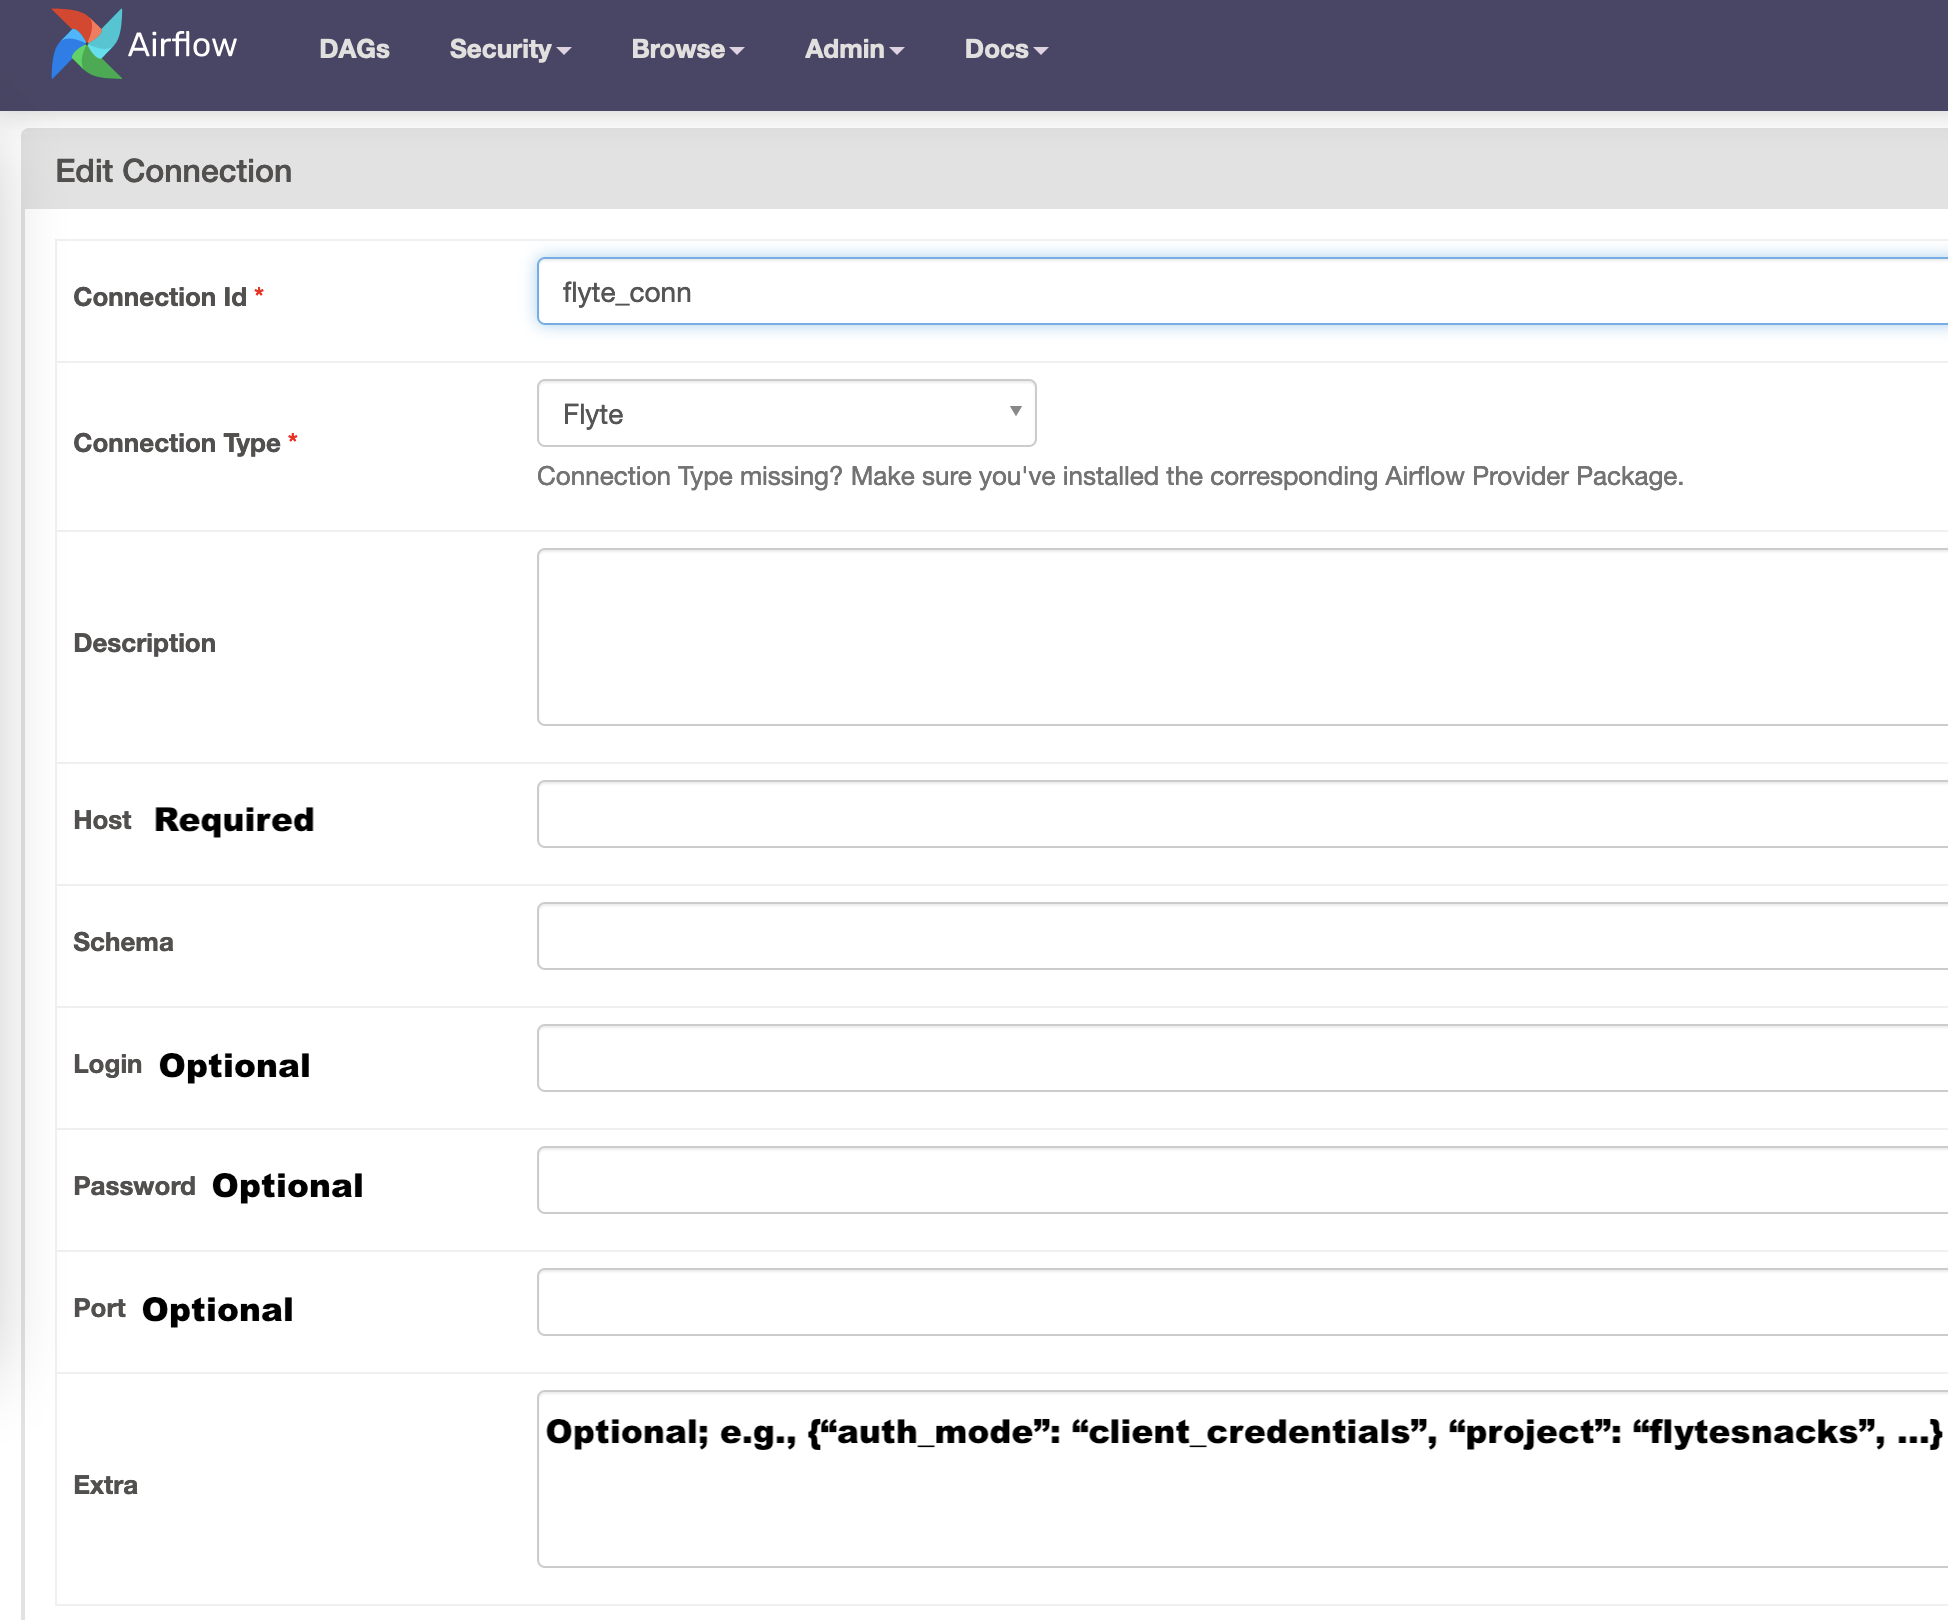
Click Save in the end.
Note
Use external IP as the Flyte Host. You can deploy Flyte on an on-prem machine or on cloud.
Register Flyte Code
At the Flyte end, we’ll train an XGBoost model on Pima Indians Diabetes Dataset. The source code is available here.
Register the example on the Flyte backend before proceeding with running the Airflow DAG.
Configure flytectl config at
~/.flyte/config.yamlto point to the relevant endpoint.admin: endpoint: dns:///<your-endpoint> insecure: true # Set to false to enable TLS/SSL connection. authType: Pkce # authType: Pkce # if using authentication or just drop this.
Clone the flytesnacks repository and go into the
examplesdirectory.git clone https://github.com/flyteorg/flytesnacks cd flytesnacks/examples
Serialize the workflow.
pyflyte --pkgs pima_diabetes package --image "ghcr.io/flyteorg/flytecookbook:pima_diabetes-latest" -f
Register the workflow.
flytectl register files --project flytesnacks --domain development --archive flyte-package.tgz --version v1
Create an Airflow DAG
Place the following file under the dags/ directory. You can name it example_dag_flyte.py.
from datetime import datetime, timedelta

from airflow import DAG
from flyte_provider.operators.flyte import FlyteOperator
from flyte_provider.sensors.flyte import FlyteSensor

with DAG(
    dag_id="example_flyte",
    schedule_interval=None,
    start_date=datetime(2022, 1, 1),
    dagrun_timeout=timedelta(minutes=60),
    catchup=False,
) as dag:
    task = FlyteOperator(
        task_id="diabetes_predictions",
        flyte_conn_id="flyte_conn",
        project="flytesnacks",
        domain="development",
        launchplan_name="ml_training.pima_diabetes.diabetes.diabetes_xgboost_model",
        inputs={"test_split_ratio": 0.66, "seed": 5},
    )

    sensor = FlyteSensor(
        task_id="sensor",
        execution_name=task.output,
        project="flytesnacks",
        domain="development",
        flyte_conn_id="flyte_conn",
    )

    task >> sensor
Also, add airflow-provider-flyte package to requirements.txt under the astro project.
Run the Workflow
Run the command
astro dev start.Trigger the Airflow DAG by clicking the “Trigger DAG” button on the Airflow UI.
Verify if Flyte execution got triggered on the FlyteConsole by going to
http://<path>and navigating to the workflow page.
That’s about it! With the Flyte Airflow Provider, you get to reap the benefits of Flyte, a full-fledged machine learning orchestration service, as an extension to Airflow. For more example DAGs, refer to this folder.